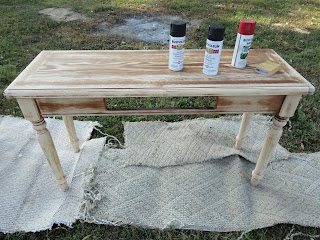
My recent DIY projects are not what I would call extensive but definitely made a big difference in our living room space. The only items I needed for these tables were a sander, primer, spray paint and sealer.
I started easy with this table because no sanding was required. I used grey primer from Rustoleum. (I'm sorry I got excited and forgot to take a "Before" picture) I was hoping to only have to do two coats of primer but it wasn't covering well, so I ended up doing 3.
 |
| Primer |
Then I sprayed the table with 3 coats of black satin paint from Rustoleum, be sure to let each coat of primer and paint dry thoroughly between each coat.
The only costs I had in this table are $3.50 for a can of spray primer and $3.50 for the black spray paint for a total of $7.00, not to shabby if you ask me!
The next two tables were a little more time consuming. Here they are before I started.
Since they had varnish on them I had to sand them down in order for them to take the paint well. I am NOT a fan of sanding, it takes way to long for my taste, even with a sander. The husband may have helped a little with this stage!
With these tables I wanted a distressed look. I wanted to add a little color to them so I painted them red first, just around the edges where I wanted to distress. Here they are with the Red Matte Rustoleum spray paint. The husband came out at this point and had a little panic attack... can't say I blame him.
After the red paint dried completely, I covered the entire table with Black Matte Rustoleum spray paint. I did 3 coats of the black paint. When the black paint dried for 24 hours I then took a fine grit sanding block and sanded where the tables would become naturally distressed over time, for example, the legs, corners and drawers.
Here is what I ended up with. (My apologies for the bad pictures, I got excited to get them back in the house and these were taken at night time)
Here is the console table finished. (with some Fall decorations)
End Table (I also added new hardware)
Close up of how the distressing turned out...I am pretty pleased
with the little amount of red "peaking' through.
Hope you're inspired to update that table that may be in the spare bedroom that could fit in nicely in your living room with a fresh coat of paint!
Here's to Love, Laughter and Happily Ever After ~SCS~


